


Stock Up with Stock Solutions for Acid Dyes
a Dharma featured tutorial
Want to achieve those gorgeous gradient colors that are so popular? To use the colors of your imagination? Stock solutions can save you time and give you greater accuracy when you want a specific color or to make gradients. With made ahead stock solutions you can have dyes ready to start with, no need to break out the dust mask or plan for wiping down every surface for any stray powder. We will go over how to make two concentrations you can choose between. This is the solution to diving into color mixing and dyeing with less prep each time.
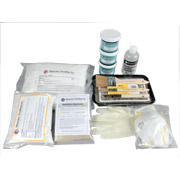
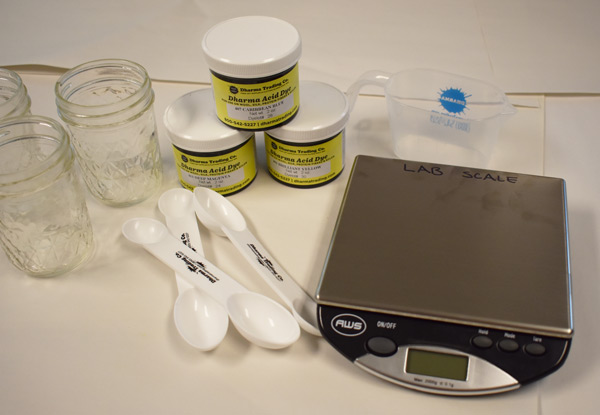
Shopping list:
Let's get started!
1% Stock Solution- This is our favorite stock solution to use for ease of calculations
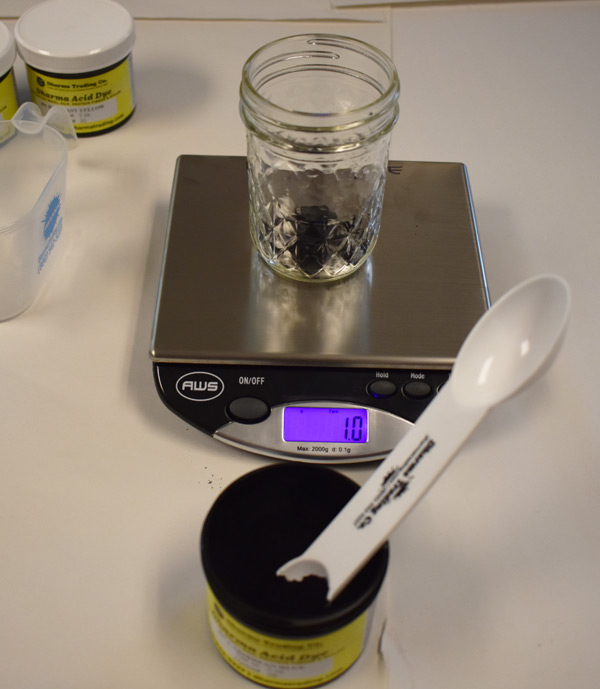
- Weight out 1 gram (0.035 oz) of dye powder; for Black and a Dark Navy, use 4 grams
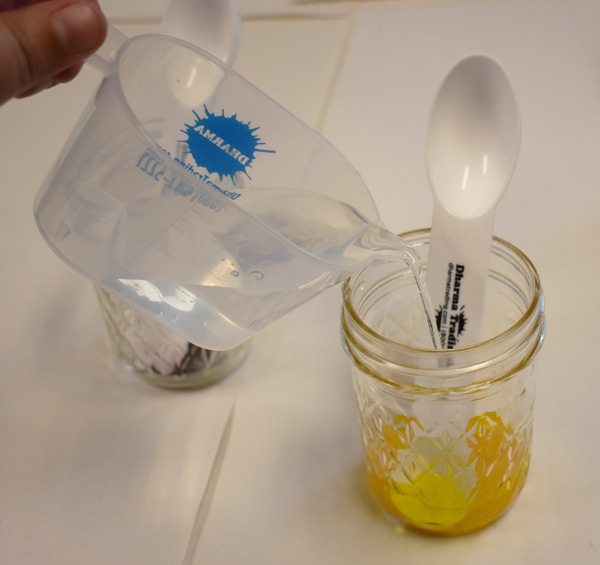
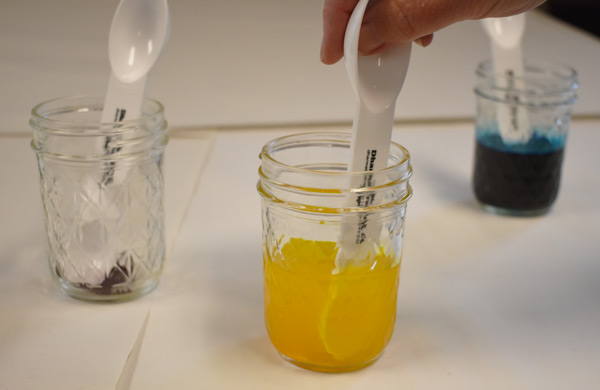
- Add a small amount of hot water and paste up the dye. A little at a time, keep adding water and stirring until you have 100ml(3.38 oz) of solution.
4% Stock Solution- A stronger solution, often preferred for French Style Silk Painting
- Weigh out a 1/2 oz. (14.17 grams), of Acid Dye powder. For Black and a Dark Navy, use 1 oz. (28.34 grams)
- Add a small amount of hot water and paste up the dye. A little at a time, keep adding water and stirring until you have 8oz (1 cup) (236.58 ml) of solution.
Note: Every color has a different solubility. Some colors are more difficult to dissolve, but most are easily dissolved. A small amount of alcohol (about 1 tablespoon) can be added to the dye solution as a wetting agent.
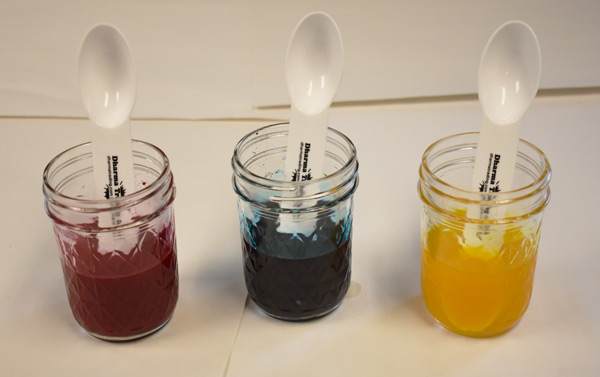
Stock Solutions will keep for a good amount of time, 6 months easily. Some colors will gel or fall out of solution when cool but warming them up in the microwave is a quick way to get them ready to use again. Glass jars make it easy to pop them in to warm without having to change containers.
You are now ready to start mixing colors for dyeing silk and wool however you wish, whether you are a silk painter or yarn dyer.
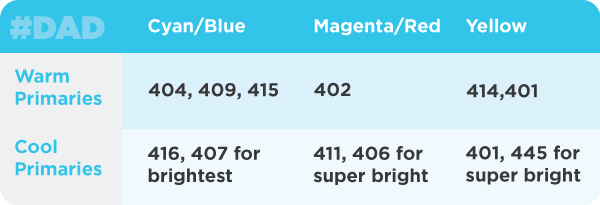
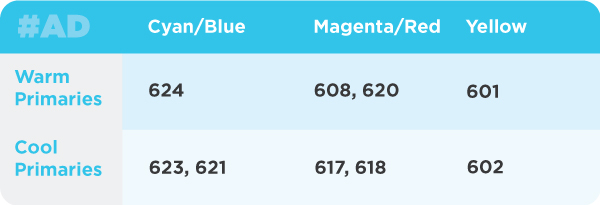
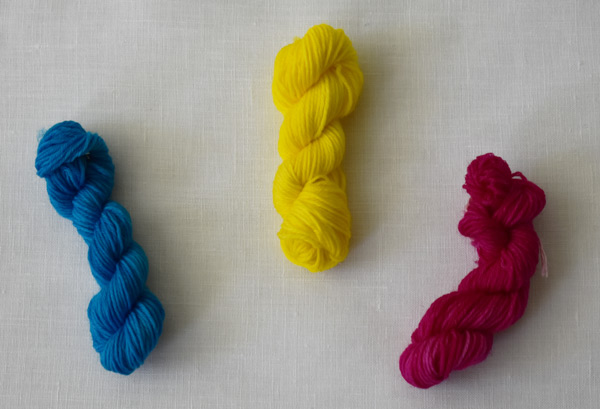
Any of the "pure" yellow, blue and red or fuchsia type colors can be used as primaries, but the charts below lists the most popular.
Dharma Acid Dye Primaries
Jacquard Acid Dye Primaries
Color Mixing Experiments to strengthen your skills:
Supplies:
- 1% Stock Solutions of three primary colors in warm or cool tones
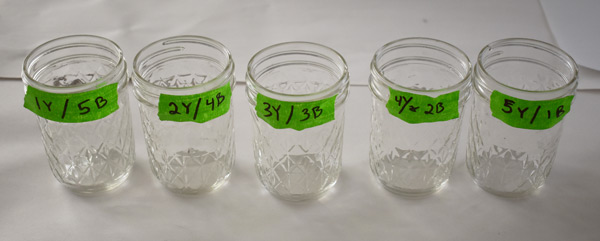
- Glass jars- At least 5 or a full set of 15 to do all of them at once.
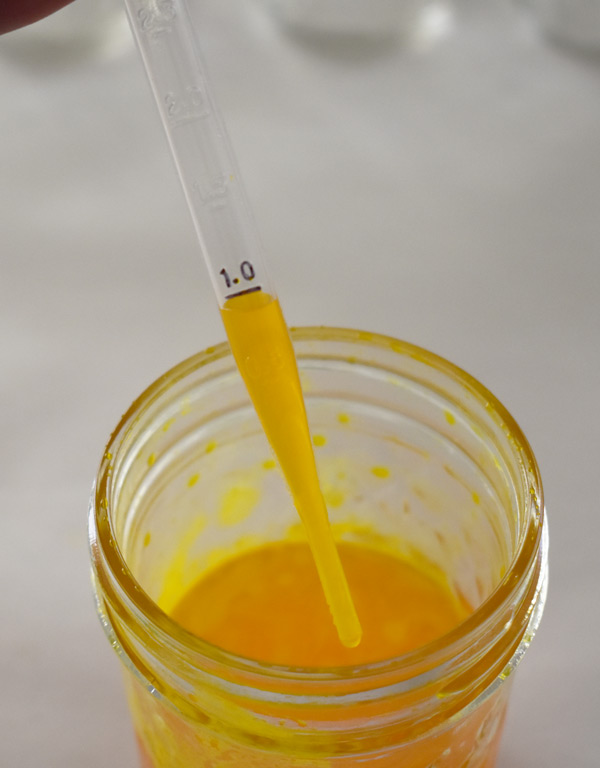
- 5ml Pipets
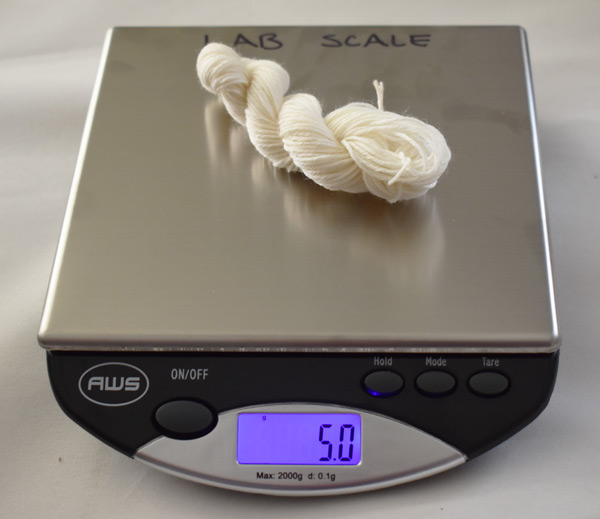
- 5 gram material samples- wool/silk yarn/fabric
Basic color mixing experiment using the 1% stock solution:
Start with 5 empty jars.
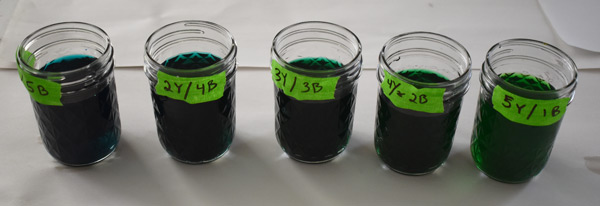
Use the Yellow stock solution and add the following amounts to the jars with a pipette:
- 1 Jar: 1ml of stock solution
- 2 Jar: 2ml of stock solution
- 3 Jar: 3ml of stock solution
- 4 Jar: 4ml of stock solution
- 5 Jar: 5ml of stock solution

Using the Blue stock solution add the amounts to the same jars:
- 1 Jar: 5ml of stock solution
- 2 Jar: 4ml of stock solution
- 3 Jar: 3ml of stock solution
- 4 Jar: 2ml of stock solution
- 5 Jar: 1ml of stock solution
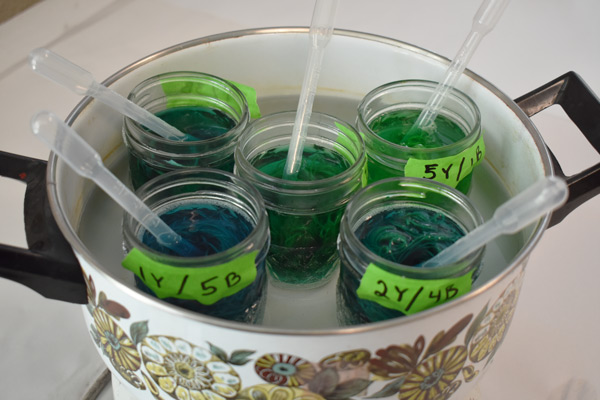
Fill the jars ¾ of the way with hot water and 1 teaspoon of white vinegar.
Add your pre-wetted fabric/yarn sample and stir it quickly to absorb the dye as evenly as possible.
To finish setting the colors you can either set the jars in a pot of simmering water for 30 min or use the microwave; doing 3-4 bursts of heating for 2 min at a time. Once the samples are set, let them cool down and then rinse in cold water. Rinse out the jars and reset them for the next round if you are doing these one set at a time.
Repeat the above steps for the other color combinations:
Use the Yellow stock solution and add the following amounts to the jars:
- 1 Jar: 1ml of stock solution
- 2 Jar: 2ml of stock solution
- 3 Jar: 3ml of stock solution
- 4 Jar: 4ml of stock solution
- 5 Jar: 5ml of stock solution
Using the Red stock solution add the amounts to the same jars:
- 1 Jar: 5ml of stock solution
- 2 Jar: 4ml of stock solution
- 3 Jar: 3ml of stock solution
- 4 Jar: 2ml of stock solution
- 5 Jar: 1ml of stock solution
Fill the jars ¾ of the way with hot water and 1 teaspoon of white vinegar.
Add your pre-wetted fabric/yarn sample and stir it quickly to absorb the dye as evenly as possible.
Again, set the colors and reset the jars for the last round.
Use the Blue stock solution and add the following amounts to the jars:
- 1 Jar: 1ml of stock solution
- 2 Jar: 2ml of stock solution
- 3 Jar: 3ml of stock solution
- 4 Jar: 4ml of stock solution
- 5 Jar: 5ml of stock solution
Using the Red stock solution add the amounts to the same jars:
- 1 Jar: 5ml of stock solution
- 2 Jar: 4ml of stock solution
- 3 Jar: 3ml of stock solution
- 4 Jar: 2ml of stock solution
- 5 Jar: 1ml of stock solution
Fill the jars ¾ of the way with hot water and 1 teaspoon of white vinegar.
Add your pre-wetted fabric/yarn sample and stir it quickly to absorb the dye as evenly as possible.
Lastly, with just 3 jars, make samples of each primary color on their own with 6ml of each color.
Setting the colors either in a pot of simmering water for 30 min or use the microwave; doing 3-4 bursts of heating for 2 min at a time. Once the samples are set, let them cool down and then rinse the samples in cold water.
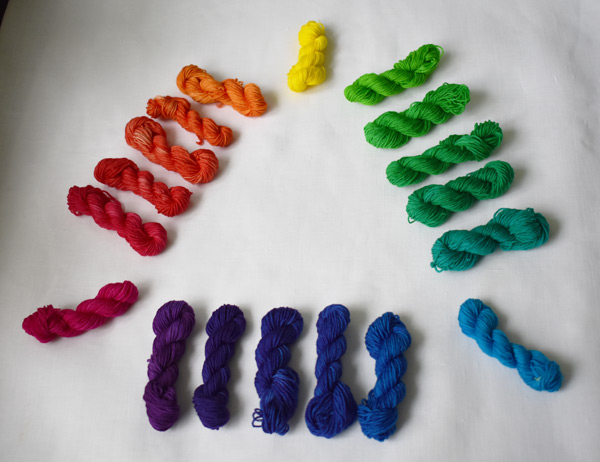
Organize your samples on a few pages of some cardstock in a binder, on index cards or however you find it handy to reference them later.
This basic exercise can be adapted by repeating it and adding drops of the complementary colors or #476 Toner Black to shift the colors into deeper shades. Try mixing all 3 primaries to get shades of brown. The more you keep experimenting the stronger your ability to mix colors on the fly will become. Keep notes as you go and soon you will be able to repeat colors predictably or match new shades much more quickly.