


Silk Flower Wedding Bouquet
a Dharma featured tutorial
Traditional flowers will last for the day but a silk bouquet will last a lifetime. We will show you how you can easily make a silky bouquet that will be a cherished keepsake for years to come.
Supplies:
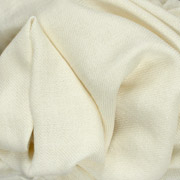
- 12mm Charmeuse/Silk Crepe Satin (#CCBSSL-Ivory, Peach, and Rose Pink)
- Woven Silk Ribbon (#SR7)
- Embroidery Needles (#DEN)
- Colored Sewing Thread
- Safety Pins
- Hot Glue gun (a mini one is fine) or Aleene's Fabric Fusion
- 3-4 glue gun refills
- Styrofoam ball, approximately 3 inches in diameter
- Cardboard/foam tube, 7-8 inches long and 1 inch wide
- Scissors
Creating Silk Flowers

Cut a strip of silk chiffon that is approximately 3x32 inches and lay it out flat. You can also cut a longer strip for larger flowers. Take the long side of the fabric and fold it over itself, leaving about a half inch free on the bottom. Use the safety pins to secure the folded fabric, I used about 6 pins.


The safety pins will act as a guide and hold the folded fabric in place. Next, use the silk thread to sew the fabric together. Follow the safety pins as a guide, create a running stitch to begin sewing the fabric together (you can also use a sewing machine). You want to create volume and ruffles by overlapping folds as you sew. Every stitch, add a new fold, it does not need to look pretty or be in a straight line:


Once you reach the end of the strip, roll about 2" of the end to create the shape of the flower bud. As you roll up the fabric, use the sewing thread to stitch together the folds of the petals. This is why we left about a half inch of free fabric on the bottom. This is where you will use the thread to sew the fabric together as you roll. You can pull tightly as you stitch the bottom but pay attention to the petals because you need the flower to have volume. Pulling too tight can cause the flower to lose volume and become smaller.

Once you have reached the other end use the thread to stitch together the base of the flower. For this sized bouquet we created twenty six flowers. These flowers will look great on flower girl dresses, baskets, and headpieces. Here are some examples of the end results:


Creating Bouquet Stem
Next you will create the stem (or base) that your silk flowers will be added to. Use the leftover silk fabric pieces to create two different cuts of fabric; a rectangular piece to wrap it around the foam ball and a triangular piece to wrap around the cardboard tube. You can also use a dowel for the stem as long as it is sturdy. Be sure to measure out enough fabric so there will be plenty to cover these two items.

Take the tube and starting from one corner of the triangle, roll the triangular fabric around it so it overlaps as you go. This will cover the tube completely. Use the hot glue gun to secure the fabric to the tube as you are going. Use minimal glue as the spots can show through once dry:


Tuck the ends of the fabric into the tube and use the glue gun to secure them.

Now you will do the same thing with the foam ball and the rectangular fabric. Add some hot glue to the surface of the foam ball and wrap the fabric around it, twisting off the ends. Use hot glue to secure the twisted fabric together.

Now you will combine the silk fabric tube with the silk ball you've just created. Trim off the edges of the silk ball so you're left with just an inch or two of fabric - enough to insert into the tube and act as a means of holding the two together. Line the inside of your tube with hot glue and add the end of the ball. Then add another layer of hot glue around the edge of the tube to further seal the connection between the fabric tube and the fabric ball. If needed, wrap and glue a thin piece of fabric around where the tube and the ball met to make it sturdier. You will be covering them both with silk flowers so the glue you're adding at this point won't be noticeable later.

Now comes the fun part: adding the flowers to the bouquet stem you've created. You can lay the flowers out before starting to get a sense of how you would like to add them. Use hot glue to secure the base of each flower to the top of the bouquet, working your way around so the entire bouquet is covered. You can use the hot glue to carefully glue the edges of your flowers together too, which will help cover any small gaps between each flower bud.


Once you have added enough flowers you can embellish your bouquet stem. We added a few lines of woven silk ribbon to ours but you could add lace or whatever your heart's desire. We used hot glue to secure the ribbon to the stem and then tucked the ends of the ribbon into the base of the tube. You can also glue a small piece of fabric into the base to close it off.

Here are some images of the finished product:


