


Jacquard Silk Colors (Green Label) Instructions

Painting with Jacquard Silk Colors is a fun and easy way to create beautiful, professional looking hand-painted silk clothing and art. Use them to create gorgeous and unique scarves, clothing, wall hangings, pillows and more.
Because they are true dyes Jacquard Silk Colors do not stiffen the fabric at all and the natural luster of the silk shines through. All 20 colors can be blended to create an infinite variety of brilliant colors or diluted with water to create soft pastels.
Jacquard Silk Colors flow freely on silk fabric. The three most common silk painting methods differ by how they control the flow of the dye. In the serti method a resist is used to draw lines that stop the flow of dye. The antifusant method coats the fabric with a substance that inhibits the flow of dye. And finally, the watercolor method allows the dye to flow freely.
The most common method is the serti method which we will describe first. Afterward we will describe how the other two methods differ.
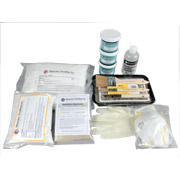
Materials:
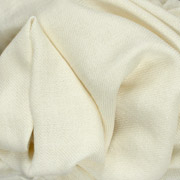
- silk scarf or fabric
- plastic cups or ice cube tray for blending colors
- brushes
- silk pins or tacks to stretch fabric
- paper towels
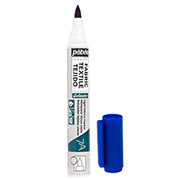
- resist (Gutta, Water Based or Permanent Metallic Resist)
- Jacquard Silk Colors
- Permanent Dyeset Concentrate
- water
- stretcher
Prepare & Stretch the Fabric
Prewash your fabric to remove oils or dirt using Kieralon or liquid detergent. Allow to air dry.
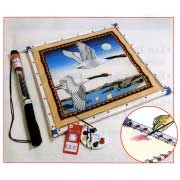
Before painting, the silk must be stretched tightly on a frame and suspended above the work surface. There are a variety of types of frames you can use, depending on the size of the piece you are painting and the materials that are available to you. Embroidery Hoops are ideal for small projects and we also sell a Stretcher Frames System specifically made for stretching fabric. Artist's canvas stretcher bars also work very well and are sold at most art supply stores in different lengths (in pairs). Old wooden picture frames work well or you could build your own frame with wood. The wood that you use needs to be soft enough to allow Push Pins or 3-Pronged Tacks to be pushed into it. In a pinch, you could also cut out a frame from a cardboard box.
If you are painting a piece that has already-finished edges (such as a scarf), you will need to make sure that the inside measurements of the frame, are at least 2-3 inches larger (on each side) than the silk piece you will be painting so that the edges of the silk will not make contact with the stretcher bars (which would leave unwanted paint marks on the silk). You can create a 'trampoline' effect with rubber bands and safety pins or silk clips.
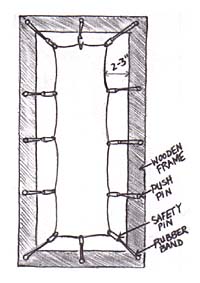 Stretch your silk onto your frame with stainless steel push pins or silk thumb tacks every 4-6 inches along each side. Begin in one corner and work your way around the frame, pulling it taut as you go. Another method is to use rubber bands and safety pins or silk clips: attach small safety pins or clips connected to rubber bands to the edges of the silk, every 4-6 inches; the rubber band then goes around a push pin which pins into your frame). If need be, you can link rubber bands together for extended lengths. The advantage of the rubber bands method mentioned above is that the elasticity of the rubber bands will maintain the tension of the silk for you.
The goal when stretching your silk is to create just the right amount of tension so that the silk remains taut while you are painting but not so tight that it tears. Your piece may have a tendency to sag a bit once it becomes wet with dye or paint; you may need to adjust the pinning as you are painting.
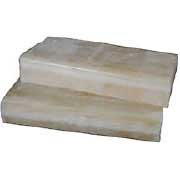
Your frame also needs to be suspended a few inches above your table so that the silk does not have anything touching it; you can do this by placing upside down plastic cups or wood blocks underneath each corner of your frame.
Apply the Resist
In the serti technique, lines are drawn with gutta on the fabric and the dyes are applied within these lines. When painted on, the dyes will flow and spread on the silk until it reaches the resist lines. The gutta resist acts as a boundary between colors much like lead in a stained glass window. These islands of color can be blended, highlighted or accented with other colors. (See watercolor technique below)
- Pour the resist into the dispenser bottle, replace the plastic insert and screw on the metal tip.
- If you are using a pattern, center the pattern on your work space and place the stretched fabric on top of the pattern. Most silks are light enough that the pattern lines will be visible through the fabric. Trace the pattern with the gutta, or trace lightly with a pencil and then go over the pencil lines with the gutta.
- Hold the gutta bottle like a pencil. Gently squeeze the bottle until the resist begins to flow. It is a good idea to practice on a separate piece of silk or paper until you get the feeling of drawing smooth, flowing, continuous lines.
- Begin drawing your pattern. Move steadily, but not so quickly that you leave gaps in your lines. All lines must be connected or the dye will bleed through the gaps in the gutta line.
- Once you've completed the design, carefully examine the lines. Make sure the gutta has penetrated through to the back. Thin gutta with gutta solvent if necessary. Go back and fill in any gaps let gutta dry completely, usually 30 minutes. You can use a hair dryer to speed drying time.
Mix and Apply the Dye
Although Jacquard Silk Colors are available in 20 shades, most colors of the spectrum may be mixed from three primary colors: yellow, magenta and cyan. The dyes are concentrated. Using the colors full strength will yield the brightest shades. For lighter colors or pastels, the dyes can be mixed with water. If your water is hard, use distilled water. Remember that colors will appear darker when wet.
- Pour a small amount of each color you are planning to use into plastic cups or an ice cube tray. If you are mixing colors, be sure to mix enough color to complete your project as it is sometimes difficult to recreate exact shades later.
- Dip your brush gently into a color. Touch the brush to the fabric about 1/2" from the gutta line. The dye will migrate the rest of the way. Paint all areas inside the gutta lines. For large areas, work quickly painting the color from corner to corner. Always work wet to wet. Never go over a dry area.
- Let dry 24 hours before setting with Jacquard Permanent Dyeset Concentrate or steaming.
Other Methods
Antifusant Method
Instead of resist lines this method uses an antifusant that is spread on the fabric to inhibit the flow of the dye. Jacquard No Flow is an excellent antifusant for silk. Spread the antifusant liberally and evenly on the silk with a wide brush or sponge. Let dry. When painting dyes on the treated fabric use a "dry" brush - ie. remove excess dye from the brush by dabbing it on a paper towel before painting. A build up of dye on the fabric will enhance spreading.
Watercolor Method
One of the most exciting methods of painting on silk simply involves letting the dyes spread and mix on the fabric. Beautiful free form watercolor effects are produced when silk is dampened and bunched on a sheet of plastic or plexiglass without stretching, allowing dye to flow into the folds producing a dramatic, textured appearance. Silk may also be stretched on a frame for the watercolor technique but will not have the textured appearance since there are no folds for the dye to flow into.
Salt Technique
A beautiful star burst effect can be achieved by sprinkling Jacquard Silk Salt on wet dye in any of the above methods. Jacquard Silk Salt is an "exploded crystal" salt which produces a stunning and dramatic burst of color. Sea salt, table salt, kosher salt, rock salt and salt pellets for water softeners may also be used for different effects. Salt should be sprinkled on very wet dye and left on until the dye is dry for best results.
Setting the Dye
Jacquard "Green Label" Silk Colors can be set in one of two ways: with Dyeset Concentrate or by steaming. The Dyeset Concentrate method is very easy and the resulting colors are truly gorgeous. But steaming will produce the absolute best colors possible.
Dyeset Concentrate Method
- Prepare the dyeset/water rinse in a container that is big enough for your piece to move freely in the liquid without being scrunched up.
- A 36" x 36" square of fabric requires about 3 quarts of water. Add 1 oz. of dyeset per quart of water. (If painting on heavier weight fabric, add a little more.)
- Plunge the piece quickly into the solution, agitating vigorously for the first 30 seconds. Continue stirring for 4-5 minutes. Do not let fabric sit.
- Remove from dyeset. Rinse again with a mild soap and water, until water is clear and excess dye has been rinsed away. Lay flat to dry and you're done.
Steaming
Steaming requires more time, but the color yield is very intense. The high temperature heat and pressure produced by steaming bonds dye and silk molecules together.
Best results are achieved using a professional home steamer. Dharma carries two types: the upright electric self-contained steamer and the stove top steamer. Smaller pieces can, however, be steamed successfully on the stove much like one steams vegetables as described below:
You will need a large pot with a rack that fits inside, white newsprint, masking tape, and aluminum foil.
- Roll the fabric in newsprint, making sure there is a layer of paper between each roll of fabric. The paper should extend a few inches beyond the fabric on either end of the roll. It is important that the fabric does not touch itself at any point. If it does, the dye will transfer from one place to another and cause smearing. Also, water from the steaming process can never be allowed to come into contact with dyed silk as it will create spots and smears. To prevent these unwanted effects the fabric must be wrapped or rolled in paper and protected from itself and condensation from the steamer.
- When all the fabric has been rolled, wrap newsprint around the bundle a few extra times. Secure the roll by taping the length of the roll. Coil gently to a size that will fit into the pot. Tape securely.
- Place rack into the pot. Pour water to a level that is well below the bottom of the rack. Make sure top of rack is dry and place bundle on the rack.
- Shape a piece of aluminum foil into a dome and place it over the bundle for protection. This will keep condensation from dripping on the silk. Make sure neither the packet nor the foil touches the sides of the pot.
- Cover the pot with the lid. Place the pot on the stove and bring water to a boil. Reduce the heat but keep it high enough to produce steam. Steam the packet for 1 hour. Allow packet to cool. Unwrap the silk and rinse in cool water to remove excess dye. Lay flat to dry and you're done.


