


Batik - Paint On Method

The steps for this process are very few and relatively easy. The Immersion Method is more advanced, but takes longer.
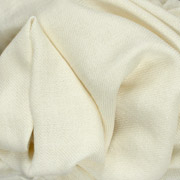
- First, pre-wash your fabric, ideally with a professional dyer's product called Kieralon . This removes most oils, sizings, and pre-shrinks the fabric. It is best to use PFD (prepared for dyeing) or RTD (ready to dye) fabric that is not treated with finishes like starch or permanent press, which will keep the dye from attaching. Iron out any wrinkles.
- Soak fabric in solution of Soda Ash (to fix the dye). Let dry completely so the wax will adhere.
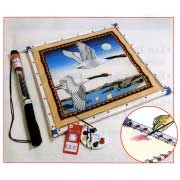
- Stretch the fabric on a Frame or Hoop that will keep the fabric flat and horizontal.
- Use premixed Batik Wax, or your own combinations of Beeswax or Sticky wax and Paraffin waxes. The more paraffin, the more the wax will crackle. By themselves, Beeswax and Sticky wax don't crackle and Paraffin crackles too much. The wax mixture is then melted in a double boiler, electric wax pot, or old electric frying pan set at about 220-240 (CAREFUL! If you heat the wax over 250 it can give off toxic smoke or burst into flames!) Apply the wax, using tools like the Tjanting or the Deluxe Tjanting for outlining, and natural fiber brushes to fill in areas. Wax designs can be repeatedly stamped onto the fabric with metal stamps called "chops", like they do in Indonesia, but they have to be symmetrical so they can be lined up and stamped in exactly the same spot on the reverse side of the fabric so that no dye will penetrate. When applying wax, no matter what method you are using, regulate the temperature so that it penetrates the fabric, not so cool that it just turns yellowish and sits on top, and not so hot that all your lines spread out too much. The wax should have a clear appearance, indicating it has penetrated to the other side. To make this easier, use an Electric Tjanting which can be regulated with a rheostat for soldering irons, so it maintains the wax at the correct temperature for you.
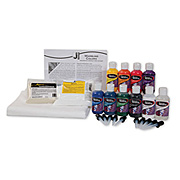
- Mix up Procion dye solution as instructed in the Soda Soak Tie Dye Recipe (be sure to include the Urea!). This will yield a dye paint which can be directly applied to the fabric. Paint the dye on the fabric where your design will be. Keep wet and allow the dye to cure for the required 12-48 hours. Curing should be done horizontally to avoid streaking and running.
- After the dye has cured, the fabric must be washed, to remove excess dye. This washing step is very important, as any dye left on the fabric will make a nasty mess when the final wax removal step is done. Rinse carefully, hand wash in cool water and Kieralon, then allow the fabric to dry.
- If a colored background is desired, wax can be used as a cover for the entire design. When the fabric is completely dry, spread wax over any areas which you wish to remain the current color, then follow our instructions for tub dyeing (or tie dyeing, for more interesting background). Allow fabric to soak in dye bath after adding the Soda Ash for no more than 30 minutes or your wax will start to erode.
- Wax removal can be accomplished in one of four ways:
- Take it to the dry cleaners and let them get it out. (Some won't do it for you)
- Boil the wax out. This is the oldest form of batik wax removal. Choose a pot that will comfortably hold your fabric and fill with water and a dash of Kieralon to get the wax and any remaining excess dye away from the fabric. Bring to a simmer/boil and add fabric. Use something to stir the fabric around in the boiling water and keep it submerged. After a few minutes, the wax will boil out of the fabric and float to the top. When the wax seems completely removed from the fabric, remove from heat and allow the water to cool. Be sure that the fabric sits on the bottom of the pan, avoiding the floating wax residue. Allow to cool and peel the hardened wax off the surface and remove the fabric. In Indonesia, people skim the hot melted wax off the boiling vats with big perforated ladles. Whatever works!
- Iron the wax out. This is also a traditional wax removal process. The fabric is sandwiched between layers of absorbent paper and heat is applied by iron, to melt the wax out. This process often leaves a wax residue (looks like a grease spot) that is very difficult to remove, so it is not recommended.
- Use hot tap water. Hang the finished piece on a line. Attach a hose to a hot water spigot, turn your water heater up all the way and run hot water over the piece to melt the wax off. A collection tub should be placed under the fabric to catch the wax and water.
- Take it to the dry cleaners and let them get it out. (Some won't do it for you)
Customer Comments

Show me another


