


Let's Make a Monster!
a Dharma featured tutorial
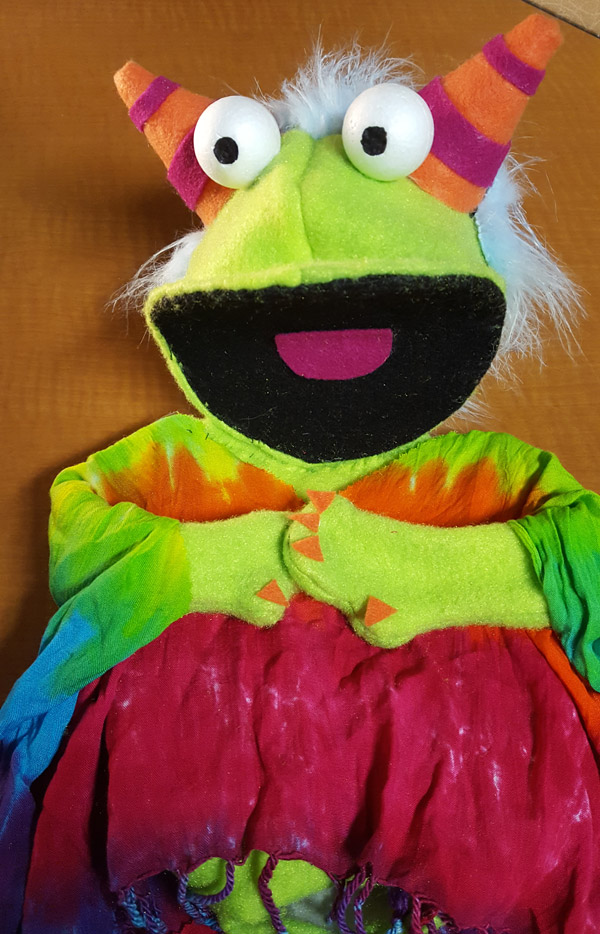
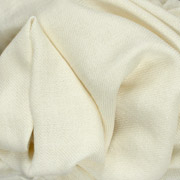
Now that Dharma is carrying dyeable "Puppet-Skin" Fleece, it seemed like it would be a lot of fun to make a monster mascot! Please welcome Dhar-monster, our loveable tie-dye wearing little monster! We found a quick and easy way to make a hand puppet out of easy-to find materials.
Supplies:
- Nylon Puppet-Skin Fleece
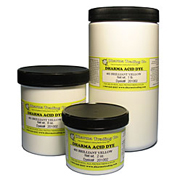
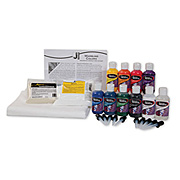
- Dharma Acid Dye or Jacquard Acid Dye
- Citric Acid or Vinegar
- All-purpose glue
- Styrofoam shapes like cones, spheres (for horns, ears, eyes, noses)
- Virgin Wool Felt or Pre-dyed felt
- Stiff plastic (like yogurt lids) for the mouth. (you're looking for a semi-rigid plastic that wants to go back to being flat so that it makes it easy to work the puppet's mouth)
- Stiff interfacing
- Fun-fur or any kind of odds and ends for your puppet (necklaces, earrings, kids t-shirts, bandanas, sequins, etc.)
- A stick or pole for arm movement (optional)
- Glue Gun (optional)
How much do I need?
You won't need much! One yard of the Puppet-Skin Fleece is usually plenty unless you're planning on making a whole horde of lovable creatures. Acid Dye in the smallest size jar, 1 /2 ounce for Jacquard and 2 ounce for Dharma Acid dye.
Let's get started!
First you'll want to think about what kind of monster you'd like to create. Does it have horns, wings? One eye, three teeth, wild hair? The possibilities are endless.
Once you have a plan, you can start with building your monster starting with dyeing up your fleece.
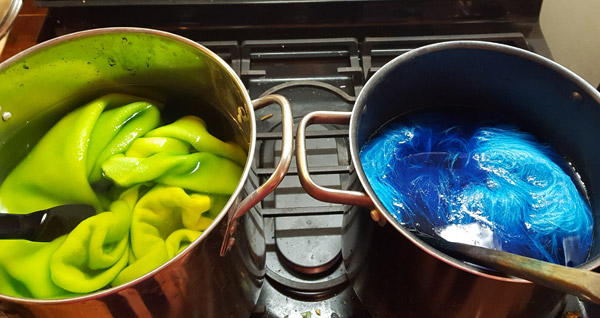
Be sure to follow the Tub Dye Tutorial for working with Acid Dyes to see how best to dye up the fleece for your project.Be sure to follow the Tub Dye Tutorial for working with Acid Dyes to see how best to dye up the fleece for your project.
Pro-Tip:
You can also elect to paint your fleece different colors and then steam it just like in the Space-Dyed Yarn Tutorial here!
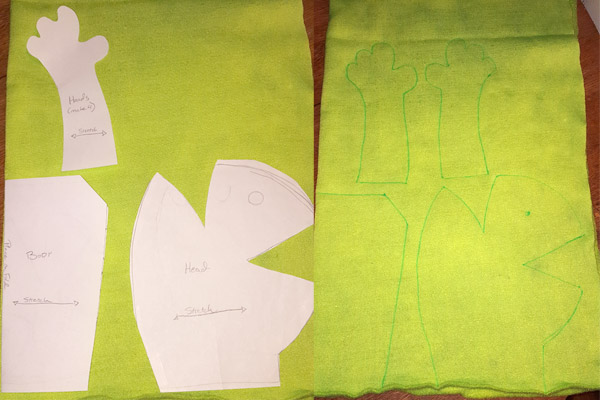
Next, you'll want to cut out your pattern. To make it easy, we have attached a template for you to try out here. Take care when cutting your patterns out, following the direction of stretch on your fabric. The puppet fleece is very stretchy one way, not so much the other. We have labeled on the guide which way the stretch needs to go. Once you have all your pieces cut, it's time to sew them up!
Pro-Tip: If you have a sewing machine “walking foot†or a foot that works well for fluffy fabrics, now is the time to use it! The puppet fleece is very fuzzy, so having this tool is helpful - but not required.
Sewing it up:
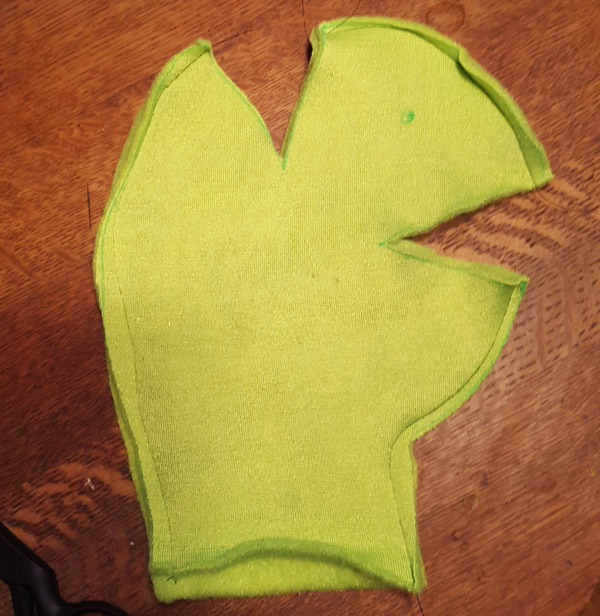
You can sew this project by hand or machine. Start your sewing by working on the head section. Sew up along the back of the neck, leave a space at the gap and continue sewing along the forehead and front lip - leave a space for the mouth gap! And continue sewing down the neck. Your first round of sewing ends up with a piece that looks like this:
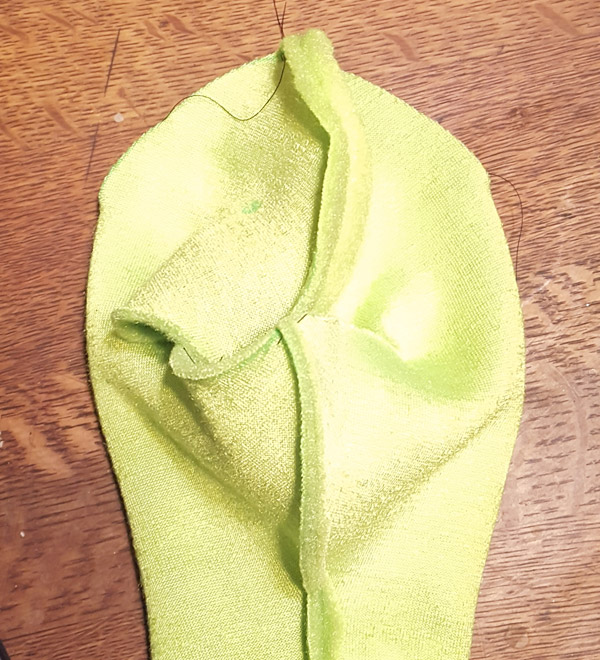
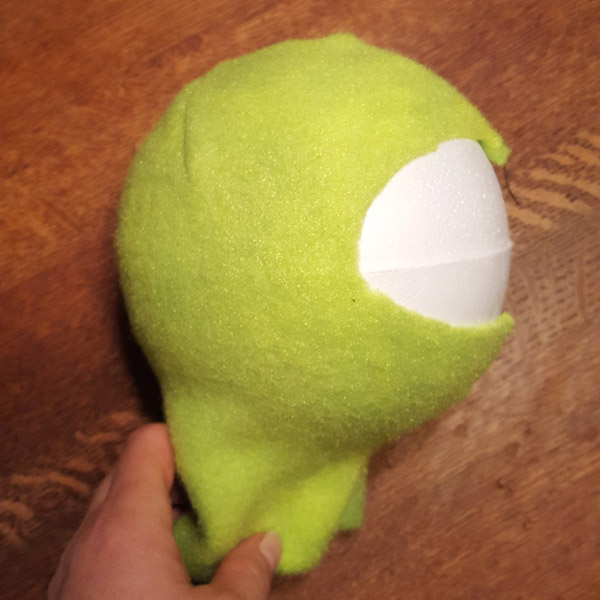
Now, take your piece, stick your hand up into the neck gap and manipulate the head gap so that you are able to make a more dome shape for your monster. After this is done, your monster should look like this:
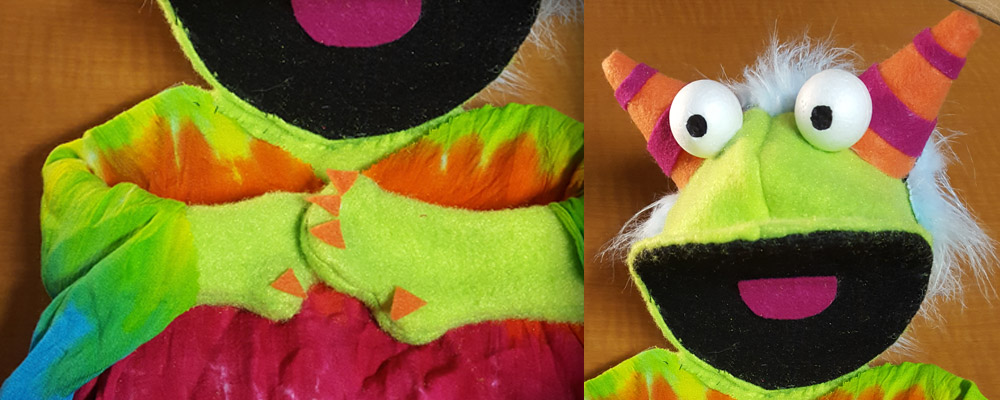
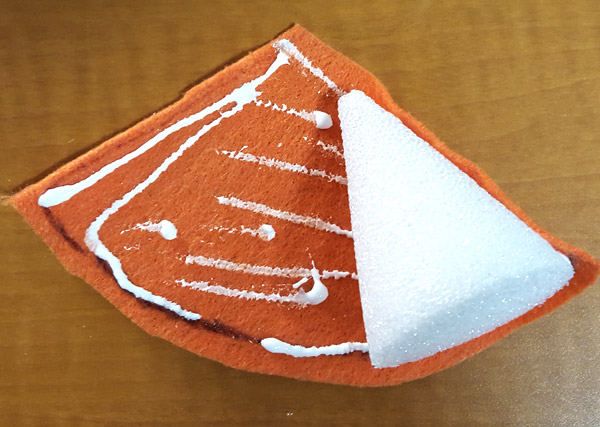
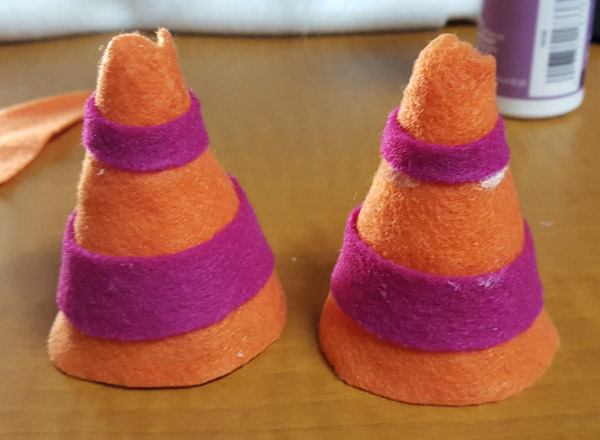
Now you can stretch your cloth around the top dome of the styrofoam head. Glue your piece to the styrofoam and let dry. We found that cutting an oval shape out of stiff interfacing helped to make a noggin for our Dhar-monster. You can also use anything to stuff your monster's dome, batting, roving and scraps all are good choices. This is also the time to install any horns, ears, eyes or other goodies to the top part of your monster's head. We chose a pair of horns which are a cone-shaped styrofoam shape with pre-colored felt glued to them:
We then painted black pupils on some smaller styrofoam spheres and used them for eyes. Googly eyes work very well too!
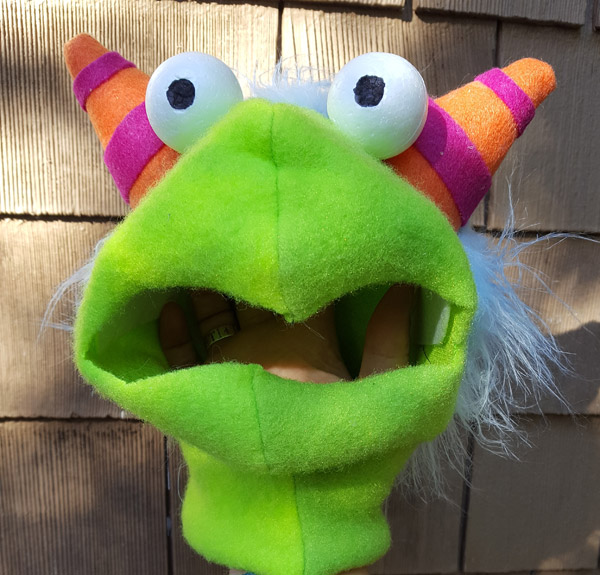
Pro-Tip: We got a large styrofoam ball to hold and shape the head of the monster which helped to keep its shape while placing on hair and horns. It also made it easy to use straight pins to temporarily hold the items to the fleece to allow for the glue to dry.
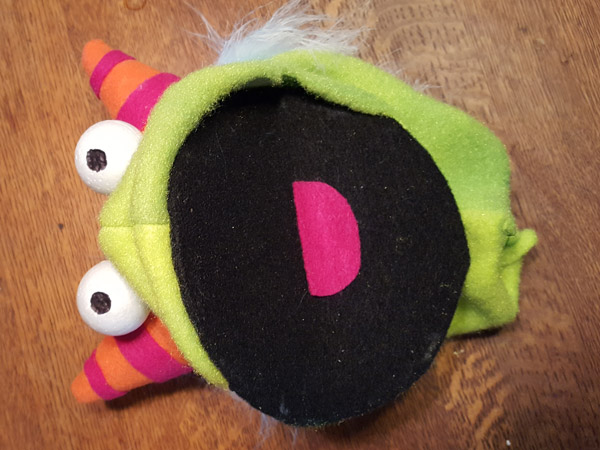
Now it's time to install the mouth! Take your circle template and cover it with some felt. You may want to take a look at some of the different ways you can design your puppet mouth. Some are just a black felt circle, some have tongues, some have a little red shape to make the back of the throat. We elected to sew by hand the mouth onto the puppet, this allowed us to make sure that the needle was going through the plastic and felt to get a secure hold. Since the mouth will get alot of action, you want to make sure it's really secure! We opted to use a circular plastic grid we found at a craft store, but any kind of plastic should work well for you - you want to choose a plastic that is flexible and has good hold and release properties (meaning that when you let go of the mouth, it wants to open up).
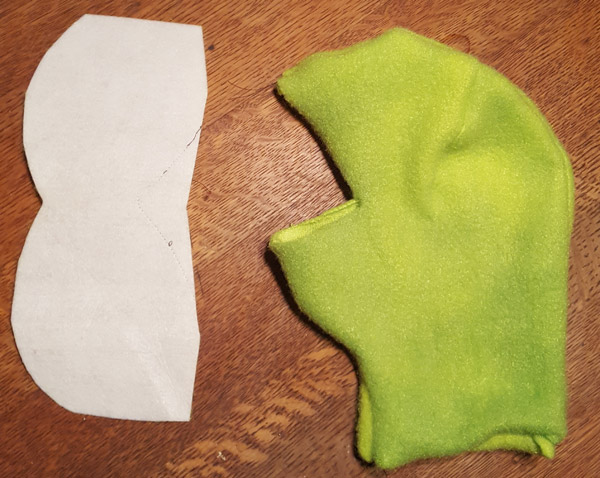
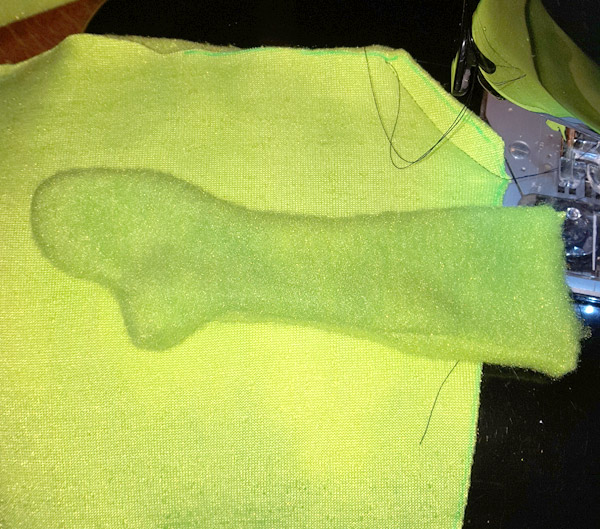
Now comes the fun of sewing the body and arms. First you'll want to sew your arms, sewing them inside out and turning them the right way out when done. Next, arrange your arms on the guide for the body, being sure to line up your fabrics like this:
1: Interfacing
2: Back fabric fuzzy side facing up.
3: Arms, facing inward on your body.
4: Front fabric, fuzzy side facing down.
Now that you have your body “sandwichâ€, you can sew all the parts together. When you turn it inside out, you'll have a ready-to-go body. We also elected to use interfacing to the back of the monster's body so that he was stiff enough to stand up on our puppeteer's hand for movement, but elected to not stiffen the front of the body so he had some movement when being handled.

You're almost done!
Next, it's time to attach the neck to the body. Again we elected to sew by hand for better control over where the body and the head were attached.
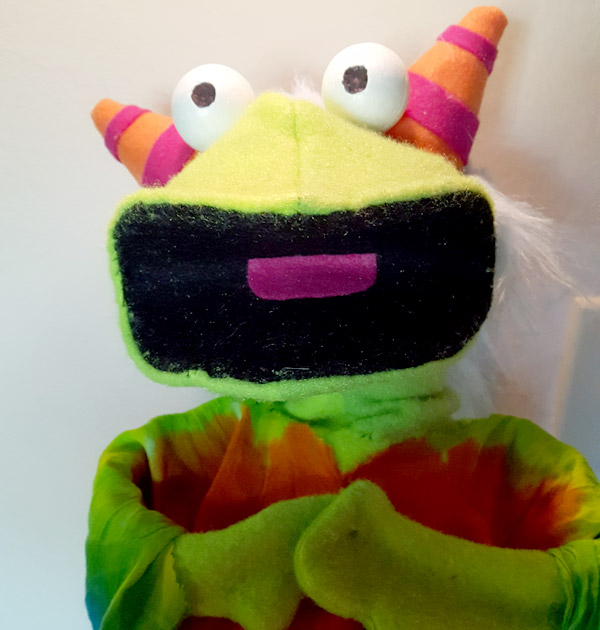
Now you can clothe your monster (we made a tie-dye poncho) and add on any little details (nails, necklaces, earrings, etc.) and you're ready to have fun with your new friend.