Scarf Fabulousness

 Ace and I were sitting in our neighborhood bar a few weeks back when he reached out to pet the scarf I was wearing around my neck. He asked if I had made it and, further, could we maybe do "some kind of scarf fabulousness" on a future craft night. I had not made the scarf in question (pictured below), and initially thought that making scarves might be far too much of a bother for a craft night. Would all the sewing fall to me? And what fabric would be suitable?
The next day, I remembered that Dharma Trading Co. has a section in their shop dedicated to blank scarves and realized that some kind of scarfy fabulousness might be quite easy to do!
The folks at Dharma Trading Co. were kind enough to sponsor our fun and together my friends and I selected 15" x 60" cotton gauze scarves and fabric markers (we went with Fabricmate Permanent FabricMarkers in both chisel tip and fine tips.) After reading that the markers worked on both cotton and silk, I added a single silk scarf to our order (more on this later).

 A few days before craft night, I made a practice scarf. The color of the wet markers is very close to the color of their caps, but the color is a bit lighter once it dries and lighter still once the scarf has been washed. Making a practice scarf and washing it proved really useful as it let us make informed choices about which colors to use and combine. I also discovered that the metallic marker didn't look metallic on the cotton gauze...maybe it works better on thicker material?
Setting up for Craft Night was as simple as opening the box of goodies from Dharma, getting out the ironing board, and pulling out a roll of freezer paper.
Freezer paper has a papery side and a shiny side, a hot iron can be used to temporarily fuse the scarf to the shiny side in order to stabilize it. This is optional, but can be really useful if you want to have a design with long, straight lines. The utility of freezer paper is magnified if you draw a grid onto the papery side before fusing the shiny side to your scarf.
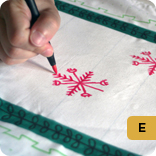
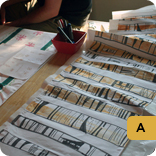
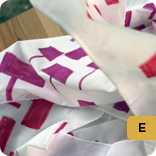
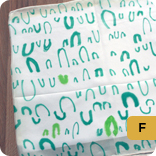
This grid(a) was drawn by Elle who showed up for craft night having done some homework: Elle has been into folk art lately. These motifs(b) are based on Ukrainian Easter eggs. After gridding her freezer paper and carefully ironing her scarf to the paper, Elle made two bold viridian stripes(c) on her scarf. Then, she added a black design on top of the viridian and an apple green motif(d) alongside the stripes. Finally, she added magenta designs(e) to the center (look closely and you can see the gridding on the freezer paper in this picture.) Her final result was gorgeous!(f)

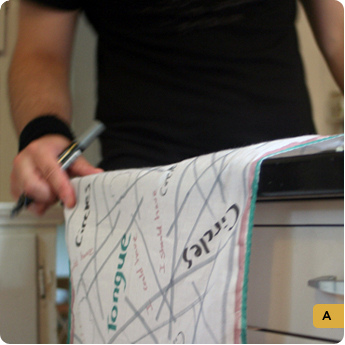
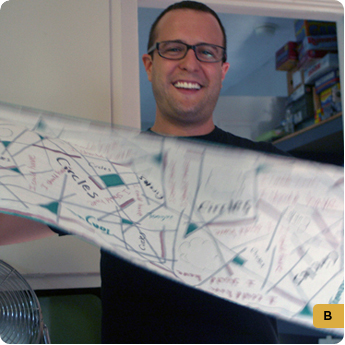
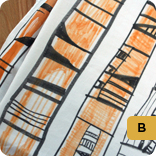
In the meantime, Ace worked away on his scarf. He didn't use freezer paper backing, but we did protect my table with some cardboard since the markers can bleed through the fabric a bit. Ace's scarf is based off of the Tori Amos song "Cloud on my Tongue"--a song that was playing on the stereo. Ace used lyrics and images from the song to fill up his blank scarf. Ace added layers and layers of text, pictures and lines(a). He used the veridian, suede, and grey markers to create something truly unique and beautiful!(b)

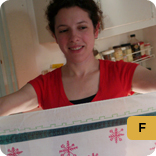
I've been researching mid-century modern design lately and based my scarves off of designs from the book Robin and Lucienne Day: Pioneers in Modern Design. Here I am with the book (Ace decided the world needed to see my mid mod dress with the mid mod book.)
This is the first scarf I worked on(a): As you can see, my yellow ocher marker ran out of juice(b)! This was the only marker that ran out of juice and it happened because it was one of the fine tip markers, but I was using it to color large areas of the scarf. I decided to work with the marker as it lightened and then leave the rest of the scarf white. I like the resulting look even though it wasn't what I had planned!
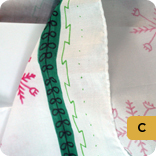
For my second scarf, I decided to marker on both sides of a cotton gauze scarf. As you can see from this shot of Elle's scarf(c), the markers don't go straight through the scarves, so there definitely is a "back" and a "front."
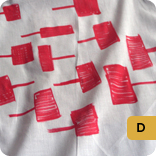
For my scarf based on the Day's pods design(d), I did one side in red and then flipped the scarf over and colored in the same shapes in crimson(e). It came out really well if I do say so myself! For my third scarf, I tried out the silk(f). I quickly discovered two things: (1) while the markers keep a precise edge on the cotton gauze, they bleed a bit on the silk, creating a sort of fuzzy edge. (2) on silk, the markers go through to the other side.
After washing everything, another difference between the silk and cotton showed itself: the colors on the washed silk changed very little while some of the colors on the cotton changed quite a bit.
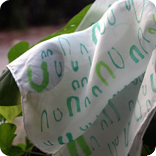 After washing everything, another difference between the silk and cotton showed itself: the colors on the washed silk changed very little while some of the colors on the cotton changed quite a bit.
I love the way the cotton scarves look.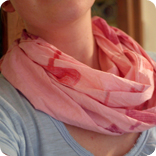 This sort of casual, faded look is perfect in the summer over a t-shirt or sundress. However, fading could probably be minimized by washing the cotton scarves by hand with gentle soap (I threw these in the machine with regular detergent). As my friends and I were working on these scarves, I kept thinking how much fun this project would be at a kids slumber party. Especially since it has basically no preparatory or clean up work! Of course, if parents did want to do some preparatory work, they could dye the scarves ahead of time. I dyed one of my scarves after the fact...the pods one. I just wanted it to be pink!
I also sewed snaps into the ends as I'm not a naturally elegant scarf wearer. You know those people who carelessly tie a scarf and it looks perfect? I'm so not one of those people, but I try to look like one. Snaps help. : )


Materials required for this activity:
Cotton or Silk Scarves
Freezer paper
Fabric Markers


