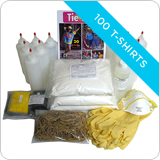
There are many traditional variations of Tie-dye around the world, including Shibori and Ikat. Here at Dharma, we consider modern tie-dye to be an American art form! Each type is unique, but basically, Tie-dye is a way of creating patterns of color by folding, tying, stitching, crumpling or otherwise preparing the fabric to inhibit the flow of the dye into the folds of the fabric. The pattern of the folds and where the colors are squirted determines the final design. With experience, the end result can be predicted and controlled to some extent, but the surprise is part of what makes tie-dye an exciting and interesting art form that even a first timer can have great results with. A fun & easy craft for children, camps and groups. The instructions that follow are for intended for use with Dharma Fiber Reactive dyes. These directions can also be used with many other techniques; use the formula instructions in steps 2 & 3 as a starting point for many other Direct Dye application methods - painting, sponging, stamping, block printing and more...use your imagination!
step 1: fold and tie your garment


Ideally, first pre-wash garments in HOT water and Dyer's Detergent to remove any oils, dirt or anything else that might resist the dye. Fold and/or tie the fabric into the desired patterns. For more defined patterns wet the shirt and squeeze or spin out excess water before folding. We have several books and DVDs with great pattern ideas!
step 2: soak garments in soda ash solution

Wear your dust mask & gloves! Use - 1 cup (8 oz.) of Soda Ash Fixer per gallon of warm water. A gallon will soak 10-12 adult XL tees - so way more kids tees, fewer dresses, etc.
Soak the tied garments about 5-15 minutes. Squeeze out the garment so it is damp but not dripping. You can reuse solution until gone.
step 3: mix your dyes
Wear your dust mask & gloves! Measure urea and warm water into a container, an old pitcher works well. Use the chart below for amounts. Paste up your dye with the urea water (see below), then add rest of water and stir 'till thoroughly dissolved. Pour into squeeze bottles with a funnel. An already wet, tied up adult tee will absorb about 4 oz of liquid dye, depending on how much you apply. Use this as a guide to help you decide how much to mix up. Check the name of each color on the label of the jar, some colors need more dye, they are marked with an * or ** by the name. IF you have a beginner's kit that has the dye and urea already, just add lukewarm water to fill the bottle a quarter way, shake, add a quarter more water, shake, then fill the bottle and shake some more.

Some colors have a (T) after the name; these colors contain Turquoise. Colors with Turquoise can benefit from adding 1 tablespoon of Glauber's Salt to each cup of dye solution but it is an optional ingredient. Test first if the exact color is really important. The above chart is meant to be used as a basic guide and you may need to adjust depending on your desired outcome.
step 4: squirt on your dye

Apply dye with squeeze bottles, paint brushes, sponges, etc., as many colors as you want. (see below for tips).
step 5: let it rest

Put tied fabric in a plastic bag (you want to keep it damp). Let it cure for at least 4 hours but preferably 24 hours for the brightest colors. In temperatures below 70º F, it takes longer.
step 6: wash it out

Pre-fill your washing machine with hot water and 1/4 cup Dyer's Detergent. Rinse the tie-dyes thoroughly before putting in the machine. Leaving ties on, rinse under cold running water (faucet, hose or shower), to stop the dye reaction. Next rinse in warm water while you untie the folds, keep rinsing until water runs fairly clear. Throw in the machine as soon as it is rinsed, running it through a full cycle. Don't wash more than the equivalent of about 8 adult size t-shirts at a time or the water gets too muddy. You can use Milsoft professional fabric softener in the final rinse to make your tie-dyes super soft!.
- Any natural fiber is great for tie-dye: cotton, rayon, hemp, linen, ramie etc. If you can't find 100% natural shirts a 90% cotton and 10% polyester or lycra is ok, but avoid 50/50 blends (come out very pale).
- When tie-dyeing silk or wool or other protein fibers, keep in mind that Fiber Reactive colors shift on these fibers, and you cannot get a true black. Soda Ash is also very hard on these fabrics, so use half as much, and don't cure for more than 4-6 hours, or use the vinegar / microwave method instead of using Soda Ash.
- It is always good to pre-wash your fabric and garments; fabric softeners, oils, and other finishes can prevent the dye from absorbing into the fiber.
- Cover your work surfaces with old newspapers or folded paper towels to absorb extra dye. Elevating the garment off the table is good too; we like old cookie cooling racks for this. Be sure to wear old clothes because dye will stain!
- Make sure you get everything covered with dye. After applying dye to one side, flip garment over and repeat the process. Inject the tip of the squeeze bottle into the folds for best dye penetration and less white on the final product.
- Put a small amount of Sodium Alginate thickener or Super Clear liquid thickener into dye mixture (step 3) to slow down the rate that the dye spreads and to create sharper edges.
- Got a leaky Squirt bottle? A couple wraps of white Teflon plumber's tape around the threads solves this problem perfectly. It is cheap and available at any hardware store. No tie-dyer should be without it!
- In step 4 any method keeping the fabric wet is OK, needn't be a plastic bag - many cover with plastic drop cloth, wrap in plastic wrap, etc. The warmer the temperature where you lay out your tie-dyes to cure, the quicker the chemical reaction.
- Use Water Softener if you suspect you have "hard" water
- DON'T USE HOT WATER. The dyes work best in lukewarm water (105 degrees). #250- Jet Black does like hot water (140 degrees)and does NOT do well for tie-dye (unless you cure your tie-dyes under an electric blanket!).
- Urea helps dye to dissolve, so dissolve the Urea in the water first. Add this water to the dye powder gradually and paste it up to avoid lumps. Undissolved dye makes "explosions" of color or "freckles", so if a color is difficult to dissolve, straining through some light fabric might be necessary. Coffee filters only work if the dye is really liquid. Otherwise, they filter out too much of the dye
- If you have trouble making a paste of the colors, a little Calsolene Oil can help because it breaks the surface tension.
- With this dye, there is always lots of "excess dye" to be washed out. Don't crowd your washing machine with too much tie-dye or the water gets too muddy and so will your tie-dyes. A key to clear, brilliant tie-dyes is the rinse and washout procedure - don't skimp!
- Delicate items like rayon are better hand washed or should go into a mesh bag on a gentle cycle so the agitation doesn't shred them.
variations
Check out these basic folding Patterns on our website (For more advanced folds Check out the books and DVDs!):
or...
- Dye shirt a solid color first using Tub Dyeing Method, then tie-dye using above method.
- After step 4, untie and re-tie in a contrasting pattern.
- After tie-dyeing item, re-tie and use Discharge paste to bleach out a contrasting pattern.
- Sprinkle pure Procion powder onto tied and pre-soaked item for different effects (super intense color! Use a salt shaker with lots of salt and some dye for a lighter application)
- Planning a tie-dye party? We can make it easier with our Group Tie-Dye Instructions.
Fiber reactive dyes attach permanently to cellulose fibers using a covalent (electron-sharing) bond. These molecules carry a "chromophore" which absorb varying spectra of the light, allowing only certain spectra to reflect. Covalent bonding is one of the most basic and strongest types of chemical reactions. This reaction happens gradually over time depending on temperature and/or the Ph level of the surrounding environment.
The Soda Ash pre-soak raises the pH level of the garment or fabric to approximately 10.5. Raising the pH level of the solution that the fabric or garment is soaked in raises the level of negative hydrogen ions in the dyeing environment. The chemical bonding process uses these ions in the reaction. Pre-soaking in Soda Ash fixer solution is what allows the fiber reactive dyes to work at room temperature. The reaction can also be assisted with heat. Some tie-dyers have had success with using baking soda and microwaving their dyed articles. Since baking soda is a weaker alkali than Soda Ash, it must be accompanied by heat. Some people who are "chemically sensitive" choose to use this method.
The dye is allowed to react in a desirable host environment for up to 24 hours. After this time, the bonding sites on the cellulose should be saturated with dye molecules. Excess dye molecules that have not bonded permanently are washed away using warm water rinse and a dye-carrying detergent like Kieralon.


