Custom Painted Trucker Hats
A Dharma featured tutorial
Make use of the great canvas provided by the front of these trucker hats with custom painted, airbrushed, and embellished designs!
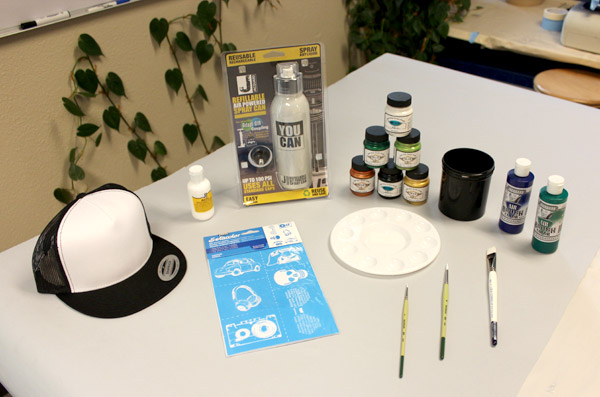
Shopping list:
- Yupoong Five-panel Classic Mesh Trucker
- Silk Screen Stencils
- Lumiere and Neopaque Fabric Paints
- Jacquard YouCan
- Jacquard Airbrush Colors
- Dye And Paint Mixing Palette
- Jacquard AirFix - 2 oz.
- Brushes
- Jar or cup for rinsing brushes
- Newsprint Paper
- Bike pump or air compressor
- Masking tape or painters tape
- Eye dropper or syringe
- Scissors
Let's get started!
1. Tape off the areas of the Trucker Hat that you do not want to get any paint on. This will leave a blank canvas you can easily work with without getting paint where you don't want it. Make sure to thoroughly check for any gaps in your tape!

2. Choose your textile paints and plan whatever fun design your heart desires.
Pro Tip: You can always decide to paint your hat free hand or to create a rough sketch of the image you would like to paint beforehand.
3. Most fabric paints require heat setting to make the paint permanent. But if you don't own a cap heat press, or have the patience to iron your hats, we highly recommend mixing Jacquard AirFix into the paints you're using so you don't have to do the awkward ironing.
3.1. For best use of the AirFix, Jacquard advises that we add approximately 1 teaspoon per quart (32 oz.) to any water-based fabric paint (or 3% by weight). Since you likely won't be using a 32 oz. jar of paint for your hat, we suggest using an eyedropper or syringe to add a single drop or two of Airfix per 2 oz. of paint you are using. That should be enough to add in the fixative without affecting the color of the paint. Essentially a little goes a long way.
3.2. In general when using Airfix please keep the following in mind: the paint & AirFix mixture must be used within six hours. If there is some paint mix left after that time more AirFix would need to be added to make it effective again. Use only in well ventilated area and avoid skin contact. (store AirFix between 40 and 100 degrees F.)
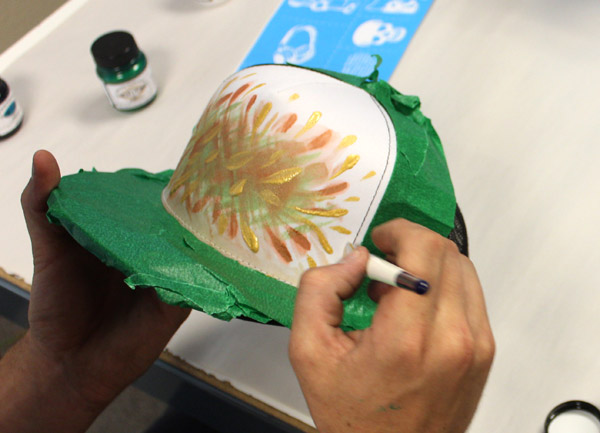
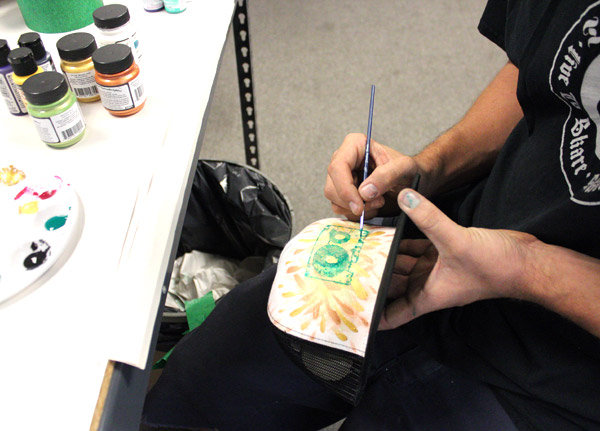
4. Now for the fun part: begin painting! Use the colors straight from the bottle or use your Mixing Palette to combine colors and come up with your own shades and tones. If using multiple colors we suggest that you have a cup of water handy for cleaning your paintbrushes throughout the process. Once you're finished painting, set aside your hat so that it can dry before proceeding to the next step.
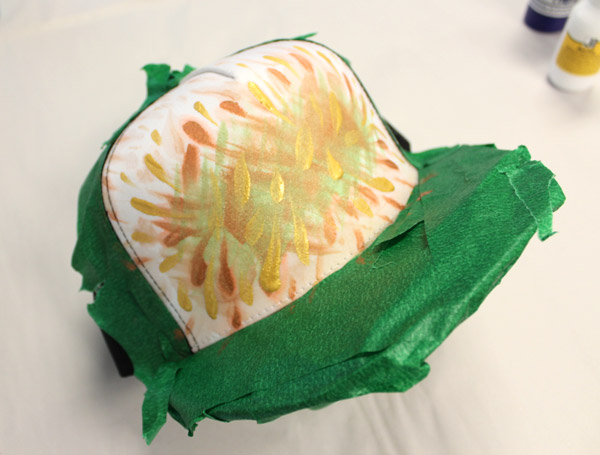
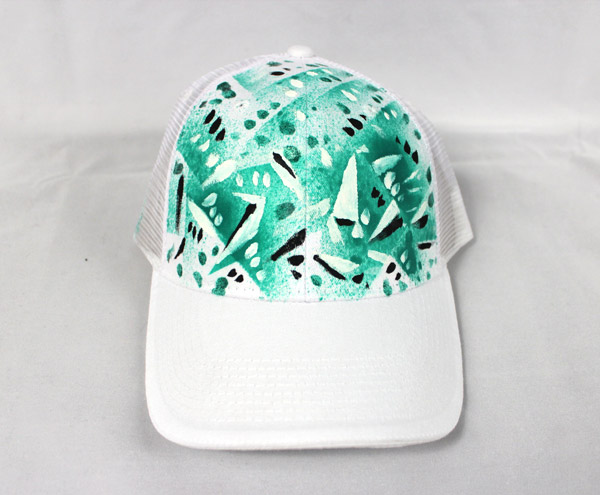
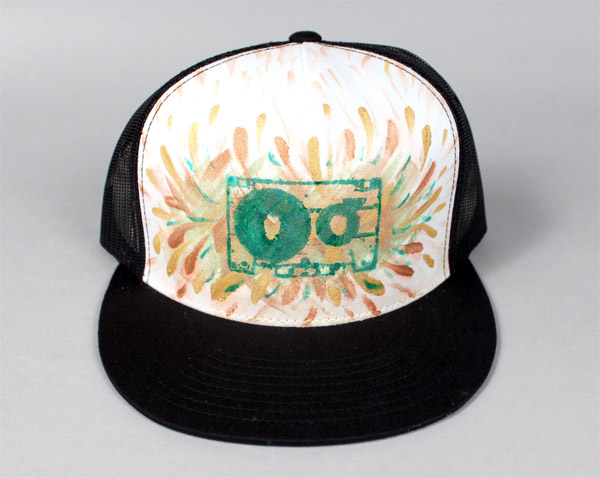
5. Once your paint has completely dried you are ready to move on and prepare to add your stenciling. For this project we used one of the Silk Screen Stencils but if you're feeling adventurous you could also try making your own stencils using Stencil Film sheets and the Stencil Cutting Tool Set.
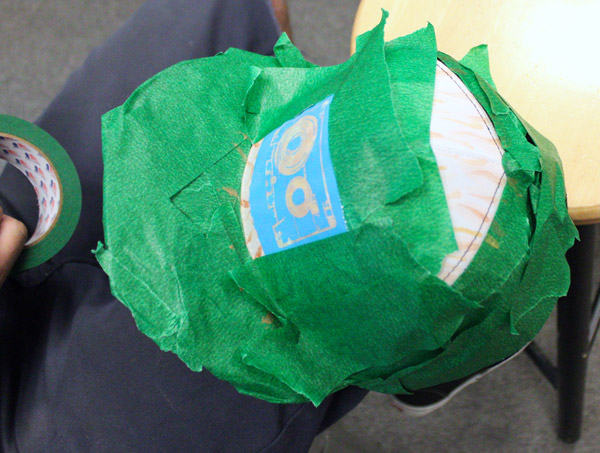
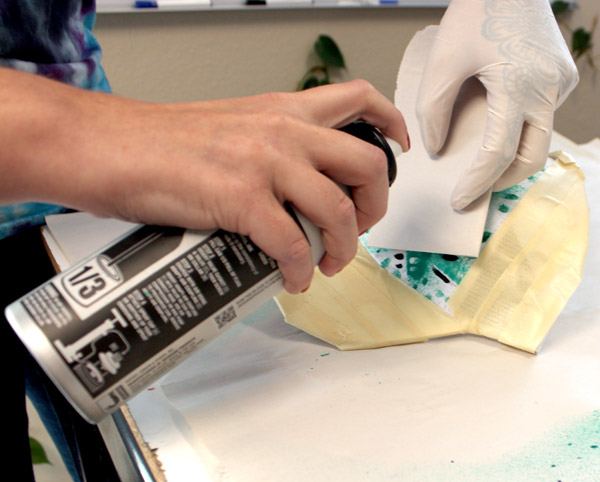
6. Cut out the stencil of your choice and position it where you would like on the cap. Tape any remaining space where you do not wish to add any more paint. Make sure to thoroughly check for any gaps in the tape so that you don't get any paint where it isn't wanted.
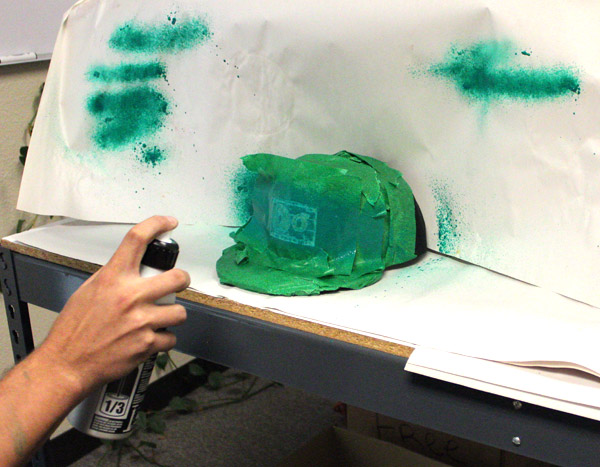
7. Fill the Jacquard's YouCan with with paint of your choosing, pressurizing with a bike pump or compressor. For this project we used Jacquard's Airbrush Colors. Check out Jacquard's instructional video here.
8. Get ready to spray over your stenciled area. The Jacquard's YouCan is not quite as controlled a spray as an airbrush, but a great option if you're not ready to invest in an expensive airbrush setup. We suggest taking a few practice sprays to get a sense of how the paint comes out from the can itself. Similarly, make sure the area you are spraying is properly covered so you don't get paint everywhere. We constructed a make-shift background to spray against using newsprint but you could also use a box or spray in a controlled environment like your garage.
9. Spray away! You may need to make more than one pass with the Jacquard's YouCan to make sure you probably cover your stenciled area.
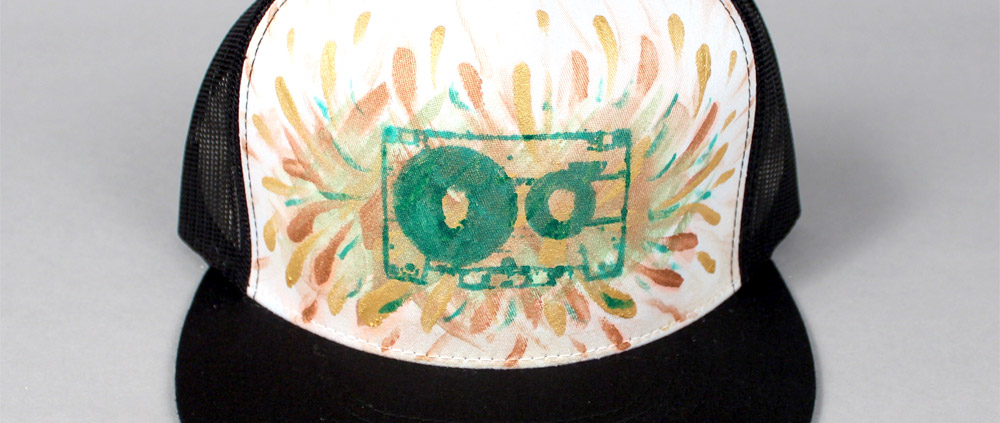
10. Once spraying is complete, carefully remove your stencil and set it aside to properly dry. You may want to use your brushes and leftover paint to touch up any areas or embellish any further.
11. We also used Jacquard's YouCan on the Valucap Sandwich with Mesh Back Trucker Hat for a fade effect by using a folded up newsprint and spraying at a downward angle. Make sure to tape up the hat and spray in a controlled area to avoid unwanted overspray. After the back ground paint was dry we embellished it by hand painting it with Lumiere and Neopaque.