


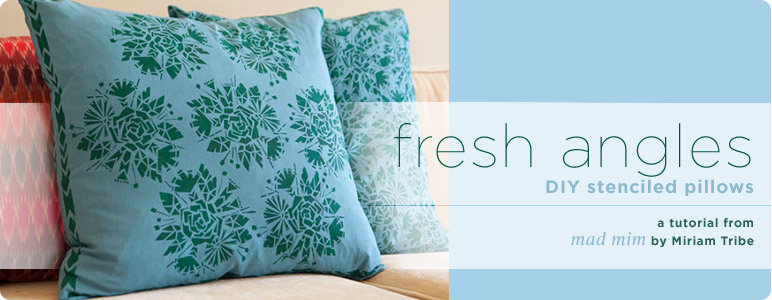
Now, you all know pretty well by now that my love and loyalties lie with the rubber block and carving tool. I really really love me some stamp carving. BUT! Who can resist the clean, crisp lines of stenciling?? So clear! So sharp! Stenciling is like block printing's perfect older sister who gets all A's, and who is kinda OCD. She's maybe a little less exciting, but you gotta appreciate that predictability! Handprinting, although not hard, does have a lot of variabilities that can affect the crispness of your results. Stenciling on the other hand, is so straight-forward; just keep in mind a few techniques, and you're gonna come out a winner.
Shopping list:
- Stencil Film 9"x 12" - Pack of 5 sheets
- Hobby Knife Set
- Cotton Sheeting Throw Pillow Covers
- Dharma Fiber Reactive Procion Dyes (#93 - Kilt Green)
- Jacquard Textile Colors (#126 - Spruce)
- Krylon Easy-Tack Repositionable Adhesive
- Steps for stellar stenciling:
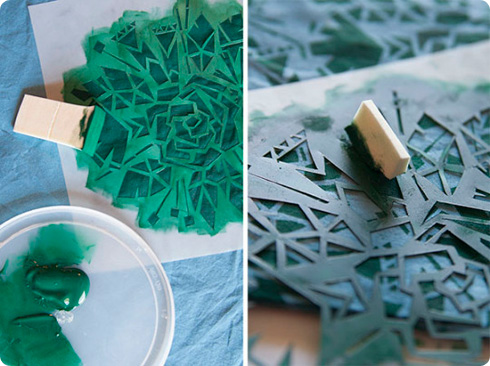
- Use good stenciling film. I've used everything from cardboard to contact paper, and although anything will work, a good quality stencil film that is transparent, thin, yet sturdy will make all the difference in getting good, clear prints. I do love using freezer paper, but it's a one time deal, and can't be reused. When I make a detailed stencil, I want to be able to use it again!
- When cutting out, use a good, SHARP utility knife. Don't waste your time with a dull one, you'll end up cursing obscenities under your breath. If the blade isn't sharp, you'll have to pull too hard, and won't be able to stay 'in the lines', which will be sad.
- Always (try to) pull your knife downwards, you'll have the most control that way. Avoid sideways or upward cuts by continually rotating your design. Oh, and use a cutting mat!
- Don't load your brush/sponge with too much paint! When you first load, blot it out a couple of times on your paint tray before applying to your project. Less paint over more passes prevents bleeding underneath your stencil.
- Repositionable adhesive spray is your friend. It temporarily sticks your stencil to your printing surface so nothing seeps underneath, and then you can just peel it up, reposition, and use again. I typically reapply every few passes.
- Always make sure to have some scratch paper underneath your printing surface so your paint doesn't bleed onto the other side!
Let's get started!
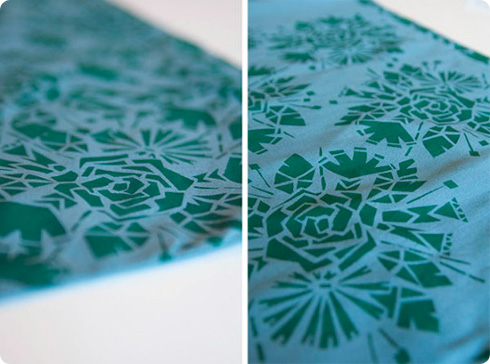
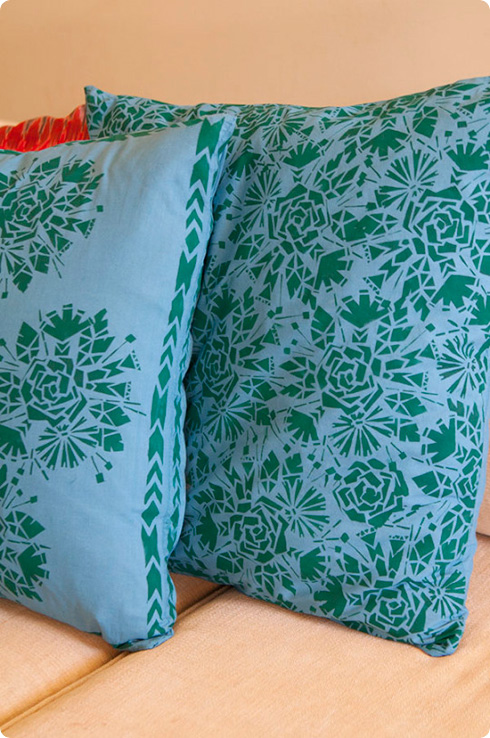
This design was inspired by some doodles I did a few days ago when I was trying to draw flowers without any curved lines. I've got a thing for hard and soft together, it's just so bangarang. Anyway, I had just been reading the super awesome book A Field Guide to Fabric Design by Kimberly Kight, and was all pumped up to turn my doodle into an all-over-print. I'm so excited to do more with this, and actually, I've been scheming about how to flesh out a quote un quote collection of designs to go along with this.
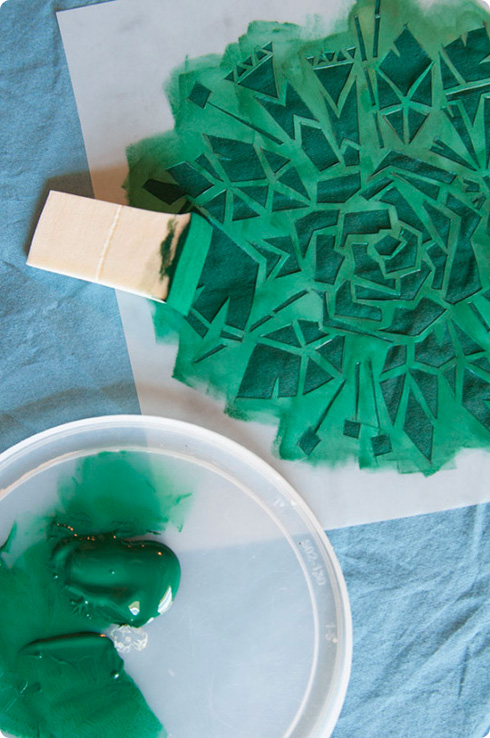
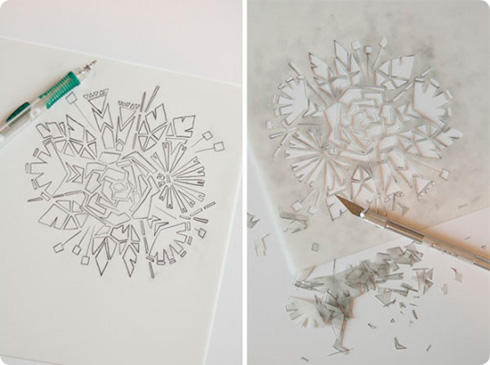
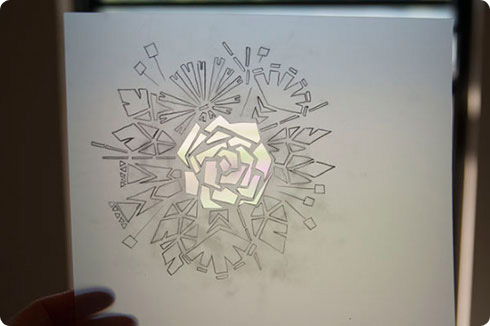
To make these pretties (my favorite is the all-over-print), start by tracing the design onto the stencil film, and cutting it out with a (sharp!) utility knife.
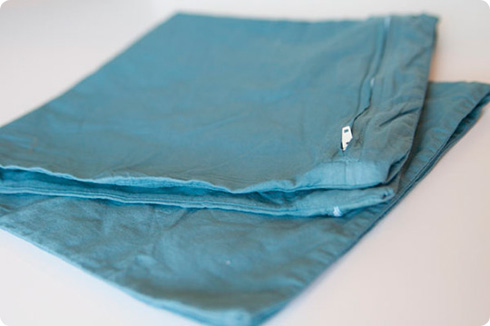
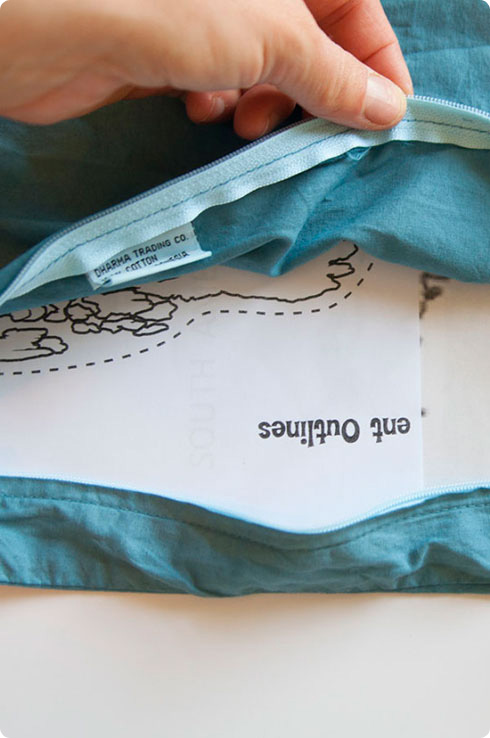
Then prepare your printing surface. I used these zippered, blank pillow covers and dyed them a soft Kilt Green (diluted the concentration to make it more subdued). Do as I say not as I did, and press your printing surface before printing (check out all Dharma's blanks!)
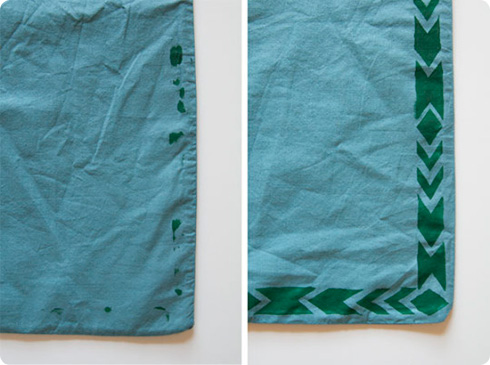
Don't forget to put scratch paper in between so nothing bleeds to the back!
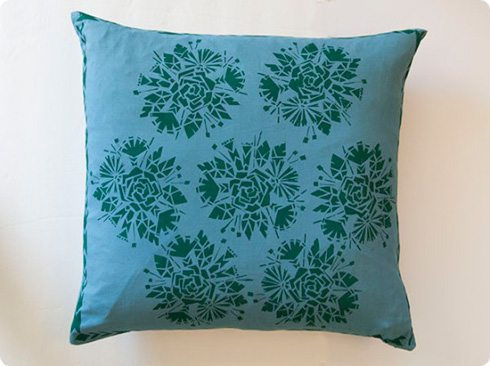
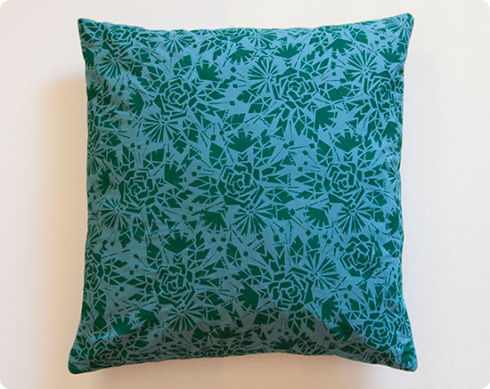
Now using a stenciling brush or sponge, apply the fabric paint (I used Jacquard Textile Color in Spruce), being careful not to pick up too much paint, eh? For a set pattern like the first pillow, it's wise to mark out where you'll print before hand. For the all over design, I packed in the stencil as many times as I could fit into the space, and then filled in the remaining spaces using sections of the stencil, no rhyme or reason. Sometimes I was filling in just the tiniest empty spaces, so for that I ripped the end off my sponge so I could print just a single flower or leaf or whatever without printing into the other parts of the design.
Doh! My paper wasn't butted up to the very edges and it bled through onto the back, so I turned that frown upside down by making it into a border. Bazinga!
Heat set your design with a quick pass of the iron, slap that baby over your pillow insert, and stand back and listen to the hallelujah chorus sing.
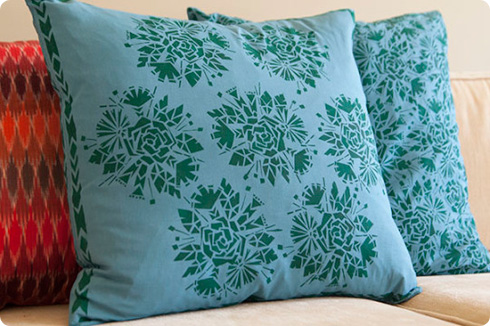
And what about that awesome ikat pillow, you ask? I got that gorgeous print at Michael Levine, and a 1/2 yard of that masterpiece gave me two amazing pillows!
And just like that my couch is my favorite part of my living room. Pencil, stencil, paint and faint, I always like to say.
This tutorial was provided by Miriam Tribe. https://www.instagram.com/miriamtribe/


