Shopping list:
- 1/3 yard light fabric (background for bubbles)
- 5/8 yard dark fabric (borders, sashing, binding)
- 14" x 36" batting
- 14" x 36" backing fabric
- 1 set Bubbles Stencils
- Shiva Paintstiks in Iridescent Tropical Colors
(Lime, Grape, Watermelon, Magenta, Sapphire, Jade) - 3 (or more) 1/2" stencil brushes
- Grip-n-Grip no-slip mat
- Spray adhesive
- Invisible marking pencil / pen (to mark on background fabric)
Let's get started!
Cut Your Fabric
Cut 2 (10") squares and one (10" x 14") from light background fabric. Cut 3 (3") strips from dark fabric for borders. Cut 1 (11/2") strip from dark fabric for sashing. Reserve remaining dark fabric for binding.
Prepare Your Fabric and Stencils
Mark a line 5" from the top and 5" from the left side on back- ground squares and background rectangle with removable chalk pencil. Place Bubbles stencils right side up on your work surface. Clearly mark the stencils as Stencil-A and Stencil-B with a permanent marker.Turn the stencils wrong side up on a piece of newspaper and spray the back side of each stencil with spray adhesive. (I spray my stencils in the garage and then go back into my work area to avoid the fumes.)
Paint Bubbles Image
Place background fabric on Grip-n-Grip mat, right side up. Position Stencil-A so that two alignment guides are even with the registration marks on the fabric. Paint the first image, using various paintstik colors and stencil brushes. Lift stencil from fabric. Place the stencil on scrap fabric and gently wipe away any excess paint before using the stencil again.
Position Stencil -B next to the first painted image, rotating the stencil until the images on the stencil match up with the painted image. (See figure B.) Use the alignment guides and registration marks to make sure the stencil is in the right place. Paint the second image, using various paintstik colors. Lift the stencil and remove excess paint from stencil.
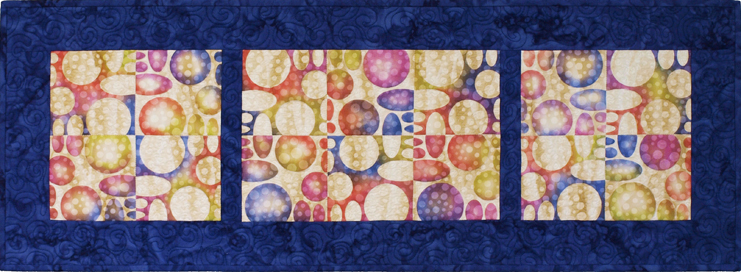
Continue alternating between the two stencils until you have painted 4 Bubble images on the background squares and 6 Bubble images on the background rectangle. (See figure C on previous page.)
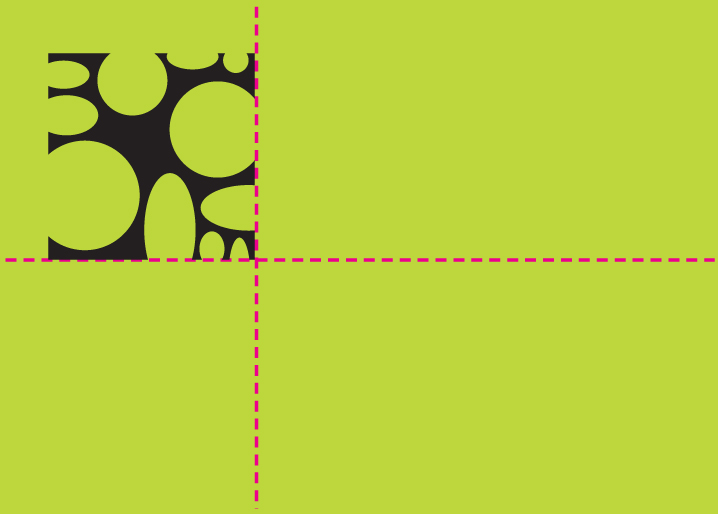
Mark horizontal and vertical registration lines. Align Stencil -A with lines and paint image.
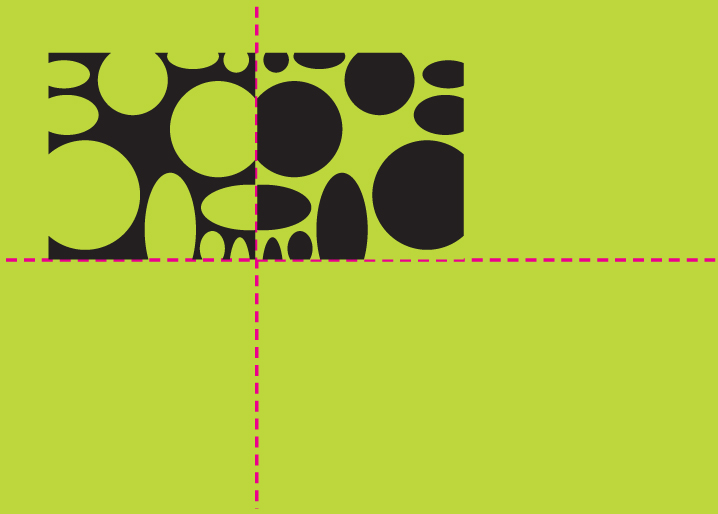
Align Stencil -B with first painted image and registration lines. Then paint image.

Continue painting alternating images until the background fabric has 4 or 6 Bubbles images.
Allow Paint to Dry and Heat Set
Allow the paint to dry for 24 hours. Gently rub your finger on part of a painted image to see if the paint is dry. If no paint lifts off the fabric, you can heat set the paint. If paint comes off on your finger, allow the paint to dry for another day.
Lay a piece of parchment paper or newsprint (unprinted) on your ironing board. Place fabric paint-side down on the parchment paper. Preheat dry iron to appropriate temperature for fabric. Press each section of the fabric for 10-15 seconds. Do not press for more than 15 seconds as you may scorch the paint.
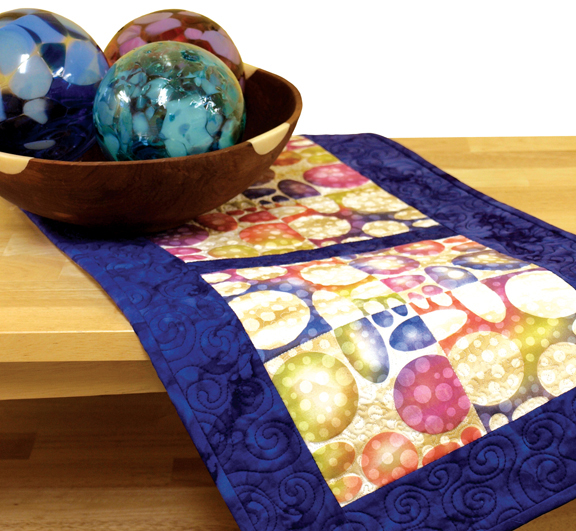
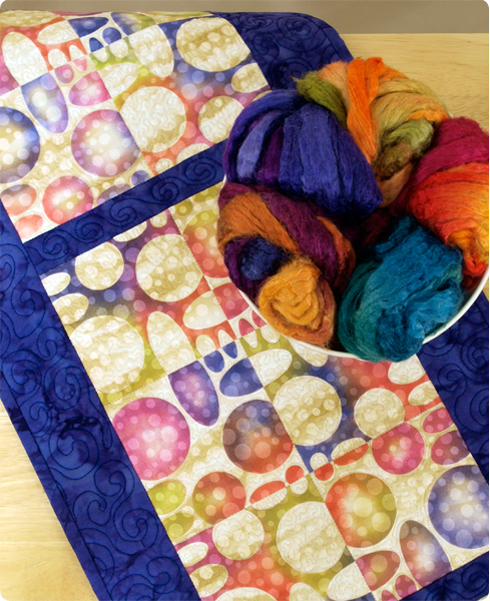
Assemble Runner
Trim painted squares and rectangle so that there is 1/4" of un- painted fabric on each side. Squares should measure 81/2" x 81/2" and the rectangle should measure 81/2" x 121/2". Cut 2 (11/2" x 91/2") rectangles from sashing strip. Cut 2 (3" x 91/2") rectangles from one border strip. Cut 2 (3" x 351/2") rectangles from two remaining border strips. Lay out pieces as shown in the diagram below.
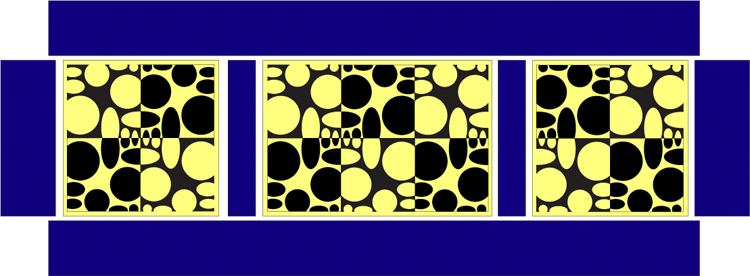
Stitch all pieces in center row together using a full 1/4" seam allowance. Press seam allowances away from painted blocks. Stitch top and bottom border pieces to center strip. Press seam allowances toward borders.
Layer and Quilt
Layer backing, batting and top. Stitch in the ditch around each of the painted sections. Stitch along each of the grid lines to anchor the painted fabric. Add any additional quilting as desired. I used a small stipple stitch in the unpainted portions of the bubble stitch and a curvy pattern in the borders and sashing.
Finish Your Runner
Trim borders to 21/4" wide after quilting has been completed. Cut binding from remaining fabric. You will need about 21/2" strips of binding. I use 21/4" wide binding strips, but you can cut the strips to your preferred width.Apply the binding using your favorite method. Enjoy your runner!